Showing posts with label Pi. Show all posts

Monday, July 8, 2013

RPi is planted

So I decided to take it upon myself to finally mount my pi/screen in my vehicle.
Here are the results, luckily the 'stang had an extra din slot for the old '00 radio that was replaced awhile back. I bought a 7"TFT of ebay for ~$30 here. I am currently looking into purchasing a digitizer for it (touch screen.)

So here we go:
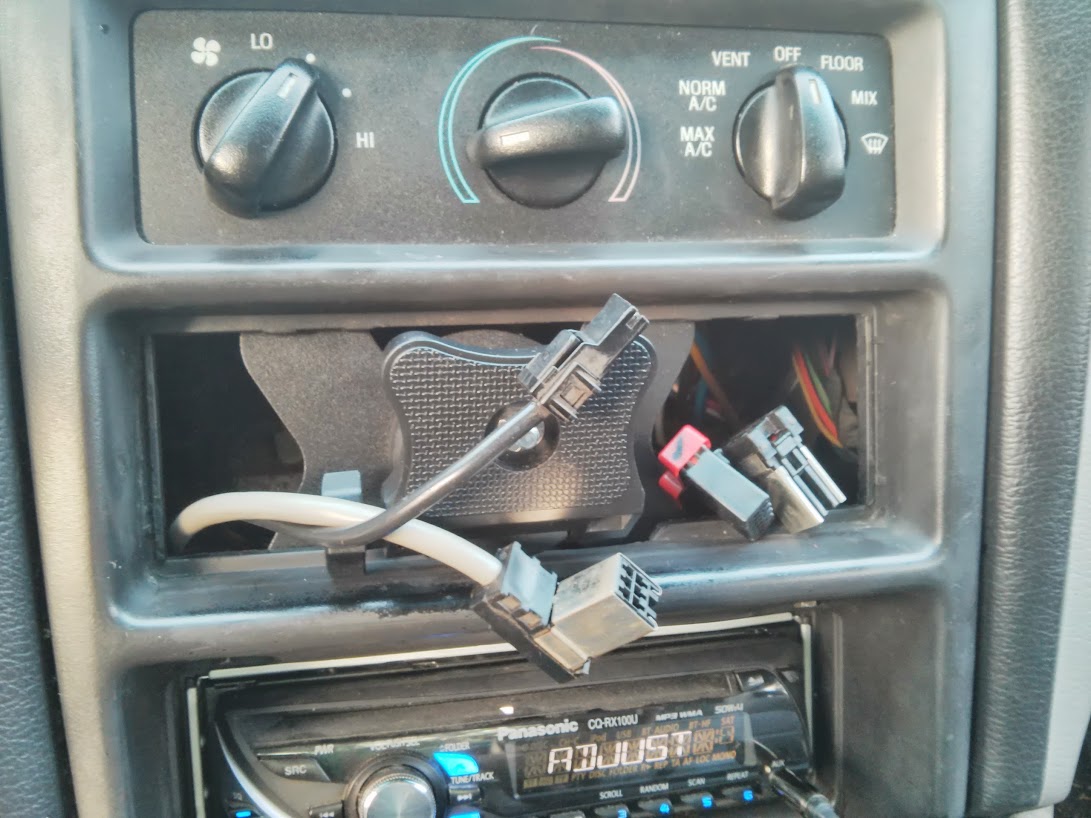
In Figure 1 notice the radio in Din 3. (Counting the vents as Din 1.)
Figure1: Before
 I then proceeded to take out the center console. Depicted in Figure 2 and 3 below.
Figure 2
Figure 3


This allowed me to mount the stand for the screen. Figure 4 Also note the radio is now in Din4.
Figure 4


The screen is slightly larger then the Din available, in order to account for this I had to improvise. I made the mount able to tilt up and down. Figure 5 and 6 below.
Figure 5
Figure 6
 I have yet to wire everything into key-on power, but here is the near-end result. Figure 7 and 8. Running pi2go ...of course
Figure 7


Through the whole process I only lost one important bolt, I call that a win. Despite the fact it was for mounting the screen. :/

So.....let me know what you think. As always if your interested in the project follow this blog, add me to your circles, or follow github.

Just for fun in-progress photos:


Soon I will be adding Bluetooth support to the UI. I also fixed that pesky UI update issue by utilizing a QThread.

**For those that care:
Built on the RPi using python2.7, QT4, 7" TFTLCD Screen

Tuesday, June 4, 2013

pi2go Is working 100%

For those that may like an update on how well pi2go is working. Well the answer is quite well actually. For this reason I will walk you through its functionality and how it works. pi2go Is written in python 2.7 utilizing pyQt4 and pySerial for Raspberry Pi. It is being created as an easy UI for a vehicle computer. So far the only feature is reading engine information from the OBDII sensor via Bluetooth.

First off in Figure 1 below  displays the given start screen.

Figure 1
As stated in a previous post I would like to place a clock in the blank space on the right. Before I attempt that I need a little more info on QThreads. Pressing the "OBDII" tab will bring up the OBDII scanning feature displayed in Figure 2 below.
Figure 2
These are the current engine stats that are being read. Currently the values are updated every 1sec, I will be adding selector so this value can be changed to personal preference. Pressing the display "Start" button will initialize the scanning thread. (Thats right this python novice introduced multithreading.) This simply mean the background process is taking place outside the main program so it does not slow itself down.
obdThread = Thread(target=self.write_to_UI(obdValue), args = (self,obdValue)) 
obdEvent = Event()
obdThread.start()
Figure 3 and 4 below display the running program.
Figure 4

Figure 3  
Above Figure 3 displays information as it comes in, before it is updated on Figure 4.
def write_to_UI(self,values):
"""Updates the UI with new values"""
# receive [speed, rpm, intake, coolant, load]
self.ui.lcdNumber_speed.display(values[0])
self.ui.lcdNumber_rpm.display(values[1])
self.ui.lcdNumber_inTemp.display(values[2])
self.ui.lcdNumber_coolTemp.display(values[3])
self.ui.lcdNumber_load.display(values[4])
QtGui.QApplication.processEvents() #Writes all pending changes to QT
return
The guts behind the scanning thread is all in pySerial. The code below show how the scanner obtains values from the OBDII sensor. This example is the speed however the method is the same for all.

First a serial port is connected, "rfcomm0" at a baud rate of "38400".
self.serialIO = serial.Serial('/dev/rfcomm0', 38400, timeout=1)
Then using the serialport you send send a hexadecimal PID which can be found here. In this case we send "01", "0D" and want a return "\r". ("01" stands for the current value, "0D" is speed.)
self.serialIO.write("01 0D \r")
The above line will return a list of 1 string "['410D1D\r\r>']" not including quotes. The bold values are what is needed. They are a hexadecimal value so the code below first pulls the needed values by treating the string as a list. Then converts (Using the example) from a string, '1D', to hex value '0x1D' to an integer, base zero, 29 to a float 29.0 The final answer being in Kph
(I apologize for that long run on sentence I hope you were able to follow)
speed_list = self.serialIO.readline().split(' ')
speed_hex = speed_list[0][4:6]
speed_float = float(int("0x"+speed_hex, 0))
 
I then converted the value to Mph and returned it in a list with other values.
speed_float = speed_float*0.621371 #Comment out if you would rather have Kph
return speed_float
The last feature I added in this version is the ability to clear error codes. It is placed in the setting tab as depicted in Figure 5.
Figure 5
This tab will have more options evenly and will have feedback to the clearing function.

------------------------------------------------------------------------------------------------------------------------------
There you have it the basic functionality of pi2go and how it works. Any feedback will be outstanding!
As always if you would like to follow/keep up on this blog or check out github. I have many new features to add.

**For those that care written in Python2.7 utilizing pyQt4 over pySerial. Issue tracker

Monday, May 20, 2013

pi2go

Well you asked for it (or maybe you didnt): My work to date on the RPi car computer, dubbed "pi2go."
Lots of pictures this time:
Figure 1
Figure 1 above displays the main screen, almost like a splash screen. I see an eventual clock going in the blank space on the right. (Will fix the scroll bars...bottom of todo list.) Pressing the tabs on the top bring the other pages. Pressing the "OBDII" tab bring the tab depicted below in Figure 2.
Figure 2
This window in Figure 2 will display a few stats from the OBD sensor. Right now all I have listed is an RPM meter. This is so I can solve one problem at a time working with a new/no-longer-updated library. Currently the button in the bottom right starts the OBD protocol. I am thinking of nixing that in a future release and having it auto start.
Figure 3
Figure 3 above shows the next tab "Car." As of this moment only 2 buttons exist "Fog Lights" and "Accent Lights." These currently toggle the mentioned lights.

The next tab shows "Settings" which right now is empty. The current plan is to display BT and scanning options for the OBDII sensor.

My OBDII sensor comes in Wednesday......Then I can really begin testing. Right now I'm kinda programming blind.

#TODO
- Add welcome screen extras
- Incorporate more OBDII readings
- Use settings tab
- Music option (Left out until OBD is working correctly)

**For those that care
In python2.7 w/QT4 utilizing pyuic4 and Qt Designer all for RPi

- Follow the project here
   - Or right literally here (This blog )

Friday, May 17, 2013

Back to the Pi

Well I was going to brief you on the the results of Halo but I only had it going for a few hours.....but I really missed my AOKP features so went back to PACman. Ill go into more details later.

This Post is all about the Raspberry Pi. I had a new project idea; I wanted a working computer in my '00 mustang. All the new fancy cars have soooo why cant mine.

Needless to say I started working here is a preview picture (subject to change)
The big blank spot will be some sort of logo. The current plan is to have full music playback and mechanical features (lights, controls, etc...)

Let me know what you think, or even cool features.

**For those that care written in python 2.7 w/ QT4 utilizing pyuic4
    -- Check out the code https://github.com/kd8bny/pi2go