Showing posts with label linux. Show all posts

Friday, August 29, 2014

Another Useful Script - Better Brightness

Hello All! I know it hasnt been all that long since I last posted but I have another addition to my useful Linux scripts, randoScripts. Here is the previous post regarding this repo: linky! This script is particularly useful on Debian based laptops. If you have one in your possession I am sure that you have noticed that a fresh boot of the system blasts the screen brightness to the max. This script makes it so the brightness is set to a lower value on boot using the rc.local  script.

rc.local Is a script that by default does nothing and is executed last of all the startup scripts. Our plan is to edit this script to lower the screen brightness.

LETS START!

Step 1

All of my scripts are on Github:
$git clone https://github.com/kd8bny/randoScripts.git

The first thing to do is figure out what brightness value works for you. So in order to accomplish this set your display using your function keys or under Brightness & Lock in your settings menu.

Once you have found the desired setting run this command:
$cat /sys/class/backlight/acpi_video0/brightness

IMPORTANT:

If you finish this tutorial and it didnt work for you, you may need to use

/sys/class/backlight/intel_backlight/brightness

instead. For me both worked just fine, however different values were used.

Anyway, the cat command should spit out a number. The number varies depending on your display. Mine happened to be 34 so I will use that in my examples.

If you would like to practice with values via terminal before settling use this:
$echo VALUE | tee /sys/class/backlight/acpi_video0/brightness
Where VALUE is the number you want to use.

Step 2 

 Go ahead and open up the rc.local file and place the value you want in the location of VALUE_HERE. The script should now look like this:
#!/bin/sh -e
#
# rc.local
#
# This script is executed at the end of each multiuser runlevel.
# Make sure that the script will "exit 0" on success or any other
# value on error.
#
# In order to enable or disable this script just change the execution
# bits.
#
# By default this script does nothing.

sleep 1
echo 34 > /sys/class/backlight/acpi_video0/brightness

exit 0

The sleep is somewhat important in this case by waiting until the OS is completely loaded before changing the values.

Step 3

Next move the script into the proper location if you didn’t edit your own.
$sudo mv rc.local /etc
And to enable it we have to make it executable
$sudo chmod +x /etc/rc.local

Fini!

After a reboot you should now see that your screen will start at your desired value. I am considering editing the script to remember the last screen value. Not sure if its worth it.

Question??

I would really like to keep this repo going with many useful scripts. They show the real power of the Linux OS and your control over it.

Would an automated installer be a nice feature to have? Giving the user choices of scripts they may like to have.
Let me know in the comments.


**The customary for those who care
   Ubuntu 14.04, rc.local

Monday, August 18, 2014

Useful Linux scripts

Hey All! I know I havent been around of recently due to an extremely busy life. However here I am once again with something more useful for everyone! My new item on the table is a collection of Linux scripts (mostly bash) that I use everyday. Some of the collection include trim support, Google Drive, and xbind. So lets start!!!


First!!! All of these scripts can be found on Github. Linky

$git clone https://github.com/kd8bny/randoScripts.git

 FSTRIM

If anyone owns a solid-state drive (SSD) trim support is a basic requirement. The basic issue is that an SSD can write pages of memory but only delete blocks. Blocks of memory consist of many pages. i.e. (page << block) For a much more detailed explanation read here. However as of this moment Linux does not support trim automatically, but it is easily added to cron tasks. In case you are a Linux n00b cron tasks are located the system and are executed on a regular basis.
Your choices of cron are:
  • Hourly
  • Daily
  • Weekly
The script will execute whenever the system is free and calls cron. Now for fstrim I personally call this weekly, monthly might even be a better option. As soon as trim is run your files are permanently removed, this means you will NOT be able to recover anything that has been trimed. All that is required of the user is to copy the script into the correct cron folder.

$sudo cp trim /etc/cron.weekly/
BOOM! complete :) If you would like proof that is executes a log is created:
$cat /var/log/fstrim.log
 IMPORTANT!!!: Read README.md if you are using an LVM partition under EXT4.

Google Drive (grive)

As a Linux user you may know that Google has failed to provide a native drive client for us. This means you cant keep files synchronized on your drive and computer without doing so manually. Fortunately the group at The Fan Club saw the issue and provided us with grive. Grive is a 3rd party sync tool specifically for Linux. Despite how awesome this application is, it is missing an automatic synchronize. For this very reason I decided to create a cron bash script to take care of that, hence syncGrive. This script is capable of handling multiple accounts as long as they are under a single directory.


This script uses the power of the grive application by The Fan Club. To add it:
$sudo apt-add-repository http://www.thefanclub.co.za/how-to/ubuntu-google-drive-client-grive-and-grive-tools

$sudo apt-get update && sudo apt-get install grive
After the application is installed copy my srcipt to cron.
$sudo cp trim /etc/cron.hourly/
I personally run this hourly do to my extreme use of Google Drive, but choose what works for you the best. 

 IMPORTANT!!!:
  1. The script assumes the directory is "~/grive"
    1. If not change the directory in line 3
  2. By default grive does not delete removed files from the directory, however the script does. (README.md)
    1. To remove this comment: line 9:: rm -r .trash >> $LOG 
BOOM! complete AGAIN! :) If you would like proof that is executes a log is created:
$cat /var/log/syncGrive.log

xbindkeys

xbindkeys is a part of xautomation that allows you to re-purpose  extra buttons on your mouse or keyboard in Linux. I see no real reason to cover this again in this exact same blog. Here is the link to the previous write-up. Linky

Saturday, December 28, 2013

Become a key binding pro using xbindkeys

Hey all this time around Im going to show you how to set up key bindings using xbindkeys. I found the need for this after picking up a new mouse for my desktop, Logitech MX pro. I gotta say this is one beautiful mouse; darkfield laser, frictionless scrolling, too much. However it came with a few extra buttons not supported by default in Ubuntu, so of course I had to fix it. Now the following process should work on any Debian based system and any system using the xautomation package. So...... lets get started

STEP 1: Install all the packages
     Complete this using your favorite package manager. I will use aptitude in my examples.
 $ sudo apt-get install xbindkeys xautomation
STEP 2: Setup the default xbindings
    To make the necessary config file enter the command below.
$ xbindkeys --defaults > $HOME/.xbindkeysrc  
STEP 3: Find your keys
    This step works for not only a mouse, but also any key combo on your  keyboard.

    Lets run the event catcher. You can use either xev or xbindkey command. Use the -k option to catch a single event. Use the -mk option to collect multiple.
    $ xbindkey -k
If completed correctly the terminal will display something like:
"(Scheme function)"
    m:0x10 + c:248
    Mod2 + NoSymbol

This is a random button on my laptop which has no function..... till now :P
STEP 4.1: Lets edit  the config file
Use your favorite editor, I will show gedit in this example.
 $ sudo gedit .xbindkeysrc
I highly recommend removing all of the default emulations from the file. Otherwise some of your favorite shortcuts will be remapped. (About line 34 and above.) If not you can always fix it later.

Now just copy and paste your event from earlier into the file. Now, the line that reads "(Scheme function)" is the command to be run. In this example I would like it to open my calculator, being its location on the num pad.
"gnome-calculator"
    m:0x10 + c:248
    Mod2 + NoSymbol
This works a little differently when working when emulating keyboard shortcuts. Keep reading.

STEP 4.2: If you want to emulate a keyboard shortcut, i.e. use one button to "press" multiple, we need to use the xautomation package from earlier. In my example I use the thumb button on my mouse to open the unity dash and to open the window spread. The shortcuts are Super and Super+w respectively. To emulate keyboard commands we use the command "xte". Here is my command for the dash:
"xte 'key Super_L'"
b:13 + release
Use the "key" descriptor when there are no subsequent button presses. This command claims the the left super key. You could also use "Super_R" which is the right key. The "b:13" refers to the physical button of the mouse. Finally the "+ release" is very important. This assures that your finger has released the button before executing the command.

The next example is to open the window spread. This is very similar to the previous example. The main difference here is the use of the "key*" command. These descriptors assure that the middle button is pressed before the Super key is depressed.
"xte 'keydown Super_L' 'key w' 'keyup Super_L'"
b:10 + release
Just for reference here is what my file looks like.
 # For the benefit of emacs users: -*- shell-script -*-
###########################
# xbindkeys configuration #
###########################
#
# Version: 1.8.5
#
# If you edit this file, do not forget to uncomment any lines
# that you change.
# The pound(#) symbol may be used anywhere for comments.
#
# To specify a key, you can use 'xbindkeys --key' or
# 'xbindkeys --multikey' and put one of the two lines in this file.
#
# The format of a command line is:
#    "command to start"
#       associated key
#
#
# A list of keys is in /usr/include/X11/keysym.h and in
# /usr/include/X11/keysymdef.h
# The XK_ is not needed.
#
# List of modifier:
#   Release, Control, Shift, Mod1 (Alt), Mod2 (NumLock),
#   Mod3 (CapsLock), Mod4, Mod5 (Scroll).
#
# The release modifier is not a standard X modifier, but you can
# use it if you want to catch release events instead of press events

# By defaults, xbindkeys does not pay attention with the modifiers
# NumLock, CapsLock and ScrollLock.
# Uncomment the lines above if you want to pay attention to them.
#################################################################
#Thumb Button
"xte 'keydown Super_L' 'key w' 'keyup Super_L'"
b:10 + release

#Zoom Button
"xte 'key Super_L'"
b:13 + release

#Calculator
"gnome-calculator"
    m:0x10 + c:248
    Mod2 + NoSymbol

##################################
# End of xbindkeys configuration #
##################################

I hoped I was able to help! Have fun modding!

**The customary for those who care
   Ubuntu 13.10 saucy salamander, xbindkey


Sunday, November 24, 2013

GPS opinions in pi2go??

Hey all, I've decided to embrace Thanksgiving break and have been cranking away at pi2go. So far I have added some better functionality as far as threading goes and started working on adding GPS functionality.

My question to you.......What are some good features to add in a GPS tab?

Here is a basic layout I have so far:


What should I add? What should I take away?

So far I am thinking of:
- Logging data (I have a cool idea :) )
- Direction changes
- Raw stats (latitude, longitude, altitude, etc)

Thanks!!!!

If you are curious on the project, here are some links.
- pi2go
github
- Not to mention other posts 

**For those that care written in Python2.7 utilizing pyQt4 all for the Raspberry Pi


Sunday, November 10, 2013

Alt GCC android build

Have you ever had the thought of "Hey GCC has some room for improvement in my android kernel build?" Well of course you did, even if you didnt know it. One of the most well known GCC tool chains is Linaro. This tool chain includes many optimizations over GCC. Needless to say I wont bother you with too many details. Lets just say that a built kernel with an alt GCC tool chain gives android many performance improvements.

Now to the fun part. How does one do such a thing? For my builds I use the SABERMOD toolchain. It includes much of Linaro with a few more optimizations. Linky's below:

Linaro 4.8 and SABERMOD 4.9

Now within your ROM's working directory

$ cd <working dir>/prebuilts/gcc/linux-x86/arm

Unpack whichever tool chain you would like to use.

Next!

$ sudo gedit build/envsetup.sh
  
Look for the following line (line 155)


 # The gcc toolchain does not exists for windows/cygwin. In this case, do not reference it.
    export ANDROID_EABI_TOOLCHAIN=
    local ARCH=$(get_build_var TARGET_ARCH)
    case $ARCH in
        x86) toolchaindir=x86/i686-linux-android-$targetgccversion/bin
            ;;
        arm) toolchaindir=arm/arm-linux-androideabi-$targetgccversion/bin
            ;;
        mips) toolchaindir=mips/mipsel-linux-android-$targetgccversion/bin
            ;;
        *)
            echo "Can't find toolchain for unknown architecture: $ARCH"
            toolchaindir=xxxxxxxxx
            ;;
    esac
This is the directory to your tool chain change it to your new tool chain location. For example my line 155 reads
 arm) toolchaindir=arm/sabermod-4.9/bin
because that is the name of my directory in "prebuilts/" .
After making those changes you you are ready to build the android. Continue with lunch or a build script if provided.
Good Luck!!
**As always for those who care
   Ubuntu 13.10, PAC-rom 4.3, SABERMOD4.9
 

Saturday, August 24, 2013

Did somebody say custom??

So I decided to take a small break today in order to bring up an old topic.....Kernels.

Now if you're just like me, running something stock is just like "using devils left hand to care for young children." One way to change direction is to utilize an alternate kernel. Now this time I am speaking strictly of the Ubuntu distro. (Ask me later of my custom Nexus 4 kernel.) I will give you Very Easy! step by step instructions in order to harness the raw power of alternate kernels.

One may ask "What will a new kernel do?" Well in laymans terms, it allows one's system to be brought on the same level with all new linux commits straight from Linus himself. So basically "The Bleeding Edge" (Not to be confused with Ubuntu Edge *insert sad story)

Now on my system I currently run the RC Ubuntu kernel, but I will provide the links to a very good custom kernel know as pf-kernel. This kernel has many more optimizations.

First off .........NOT RESPONSIBLE FOR ANYTHING THAT GOES WRONG!!!!


Now since that is out of the way..... lets download said kernel:
- For stock Ubuntu: http://kernel.ubuntu.com/~kernel-ppa/mainline/
- pf-kernel if you choose: http://repos.natalenko.name/debian/pf/
Note: pf-kernel has many Linux optimizations read here for a good little article.

Step 1: Find the current version you need.

To play it safe grab a version with your same release name. i.e. 13.04 is "raring"
Figure 1
If you do not want to play safe.....totally cool. Besides where is the fun in safety. (Be sure to keep a backup. Covered at the end)

In order to find out your current version of kernel open a terminal and type
uname -a
Giving a response of  Figure 2. I have version 3.9.0-030900
Figure 2

Step 2: Download the right 3

On the next page you will 3 different endings "amd64", "armhf", and "i386." This is your architecture.
YOU NEED TO KNOW WHICH. To find out refer to Step 1 above.

In this example I will be using "amd64."
Next you need to download 3 files "linux-headers", "linux-image", and linux-headers-xxxxxxxxxxxx_all.deb." Refer to Figure 3.
Figure 3
Choose the correct ones for your architecture. Once they have finished downloading open a terminal and "cd" to the download location.
cd ~/Downloads

Step 3: Time to install

Once in the working directory run
sudo dpkg -i *.deb
Note the "*.deb" makes dpkg use every deb file in directory. If you have more then the 3 recently downloaded > MOVE to a new directory!

Step 4: Update

 In order to boot a new kernel you need to update the grub. In order to do this run:
sudo update-grub2
The result should be much like Figure 4 below.
Figure 4

Step 5: Reboot

The final step. Reboot your device. At the grub menu(after bios) choose your new kernel. Note: you may have to press escape in order to show the menu.
Figure 5 shows a grub shot. (Outdated)
Figure 5

Cleanup/Backup

Despite not being an actual step these are very important.
In order to rid a kernel of being installed use apt-get.
sudo apt-get remove linux-xxxxxx
 xxxxxx being the "linux-headers" or "linux-image." Remember to remove all 3 files mentioned above in Step 2.

Important: Be sure to leave at least one STABLE kernel on your system. In case something goes wrong. At least you will be able to boot to the old kernel. (This is what I considered a backup)

FINI

There you have it your very own....nonstock....kernel. If you have any questions feel free to ask.

**For those that care
Ubuntu 13.04, amd64, 3.9.0-030900-generic

Monday, July 8, 2013

RPi is planted

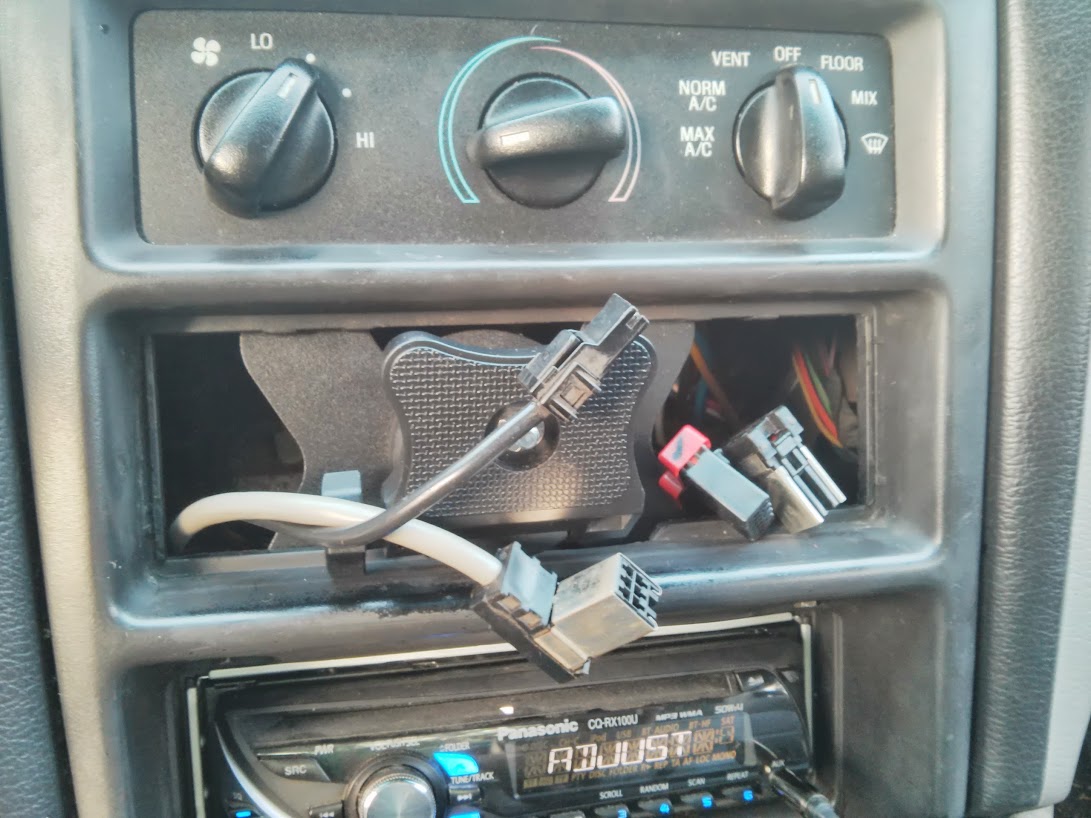
So I decided to take it upon myself to finally mount my pi/screen in my vehicle.
Here are the results, luckily the 'stang had an extra din slot for the old '00 radio that was replaced awhile back. I bought a 7"TFT of ebay for ~$30 here. I am currently looking into purchasing a digitizer for it (touch screen.)

So here we go:
In Figure 1 notice the radio in Din 3. (Counting the vents as Din 1.)
Figure1: Before
 I then proceeded to take out the center console. Depicted in Figure 2 and 3 below.
Figure 2
Figure 3


This allowed me to mount the stand for the screen. Figure 4 Also note the radio is now in Din4.
Figure 4


The screen is slightly larger then the Din available, in order to account for this I had to improvise. I made the mount able to tilt up and down. Figure 5 and 6 below.
Figure 5
Figure 6
 I have yet to wire everything into key-on power, but here is the near-end result. Figure 7 and 8. Running pi2go ...of course
Figure 7


Through the whole process I only lost one important bolt, I call that a win. Despite the fact it was for mounting the screen. :/

So.....let me know what you think. As always if your interested in the project follow this blog, add me to your circles, or follow github.

Just for fun in-progress photos:


Soon I will be adding Bluetooth support to the UI. I also fixed that pesky UI update issue by utilizing a QThread.

**For those that care:
Built on the RPi using python2.7, QT4, 7" TFTLCD Screen

Sunday, June 9, 2013

Ouch!!! I broke Unity/How to fix it

So as many of you know the dangers of playing with graphic drivers in Linux. They have to potential to render your desktop useless. In fact many remain with open source drivers for this very reason. Well anyway I have been playing around with AMD drivers for the last month and has proven to be a miserable feat. More then once this has rendered Unity broken missing both window decorators and system panels  *weep. To top it all off the Unity plug-in would become disabled from Compiz and would not re-enable for multiple reasons. (Open gl, window shutters, ...blah blah)

Anyway.......
Unity malfunction is not exclusive to graphic driver installations. For this reason I think it is important to know these following 2 commands.
sudo dconf reset -f /org/compiz/
This command resets all dconf settings that may have changed. "dconf" Is a program for editing all of your configuration files. If by chance you are missing this program run the following command.
sudo apt-get install dconf-tools
The second Unity command I believe should be general knowledge is:
 unity --reset-icons &disown
This command may not need to be run after dconf, However it is extremely useful if one decides to play with themes or other basic UI improvements.


I hope these are useful to you. I also hope you will never need them haha.

=================================================
Next I would like to do another write-up on helpful ssh tools including scp and nmap. On another note maybe dd and pv; pretty much anything I find useful and use on an almost daily basis.

Let me know if there is any particular command you would want a write-up on.

Tuesday, June 4, 2013

pi2go Is working 100%

For those that may like an update on how well pi2go is working. Well the answer is quite well actually. For this reason I will walk you through its functionality and how it works. pi2go Is written in python 2.7 utilizing pyQt4 and pySerial for Raspberry Pi. It is being created as an easy UI for a vehicle computer. So far the only feature is reading engine information from the OBDII sensor via Bluetooth.

First off in Figure 1 below  displays the given start screen.

Figure 1
As stated in a previous post I would like to place a clock in the blank space on the right. Before I attempt that I need a little more info on QThreads. Pressing the "OBDII" tab will bring up the OBDII scanning feature displayed in Figure 2 below.
Figure 2
These are the current engine stats that are being read. Currently the values are updated every 1sec, I will be adding selector so this value can be changed to personal preference. Pressing the display "Start" button will initialize the scanning thread. (Thats right this python novice introduced multithreading.) This simply mean the background process is taking place outside the main program so it does not slow itself down.
obdThread = Thread(target=self.write_to_UI(obdValue), args = (self,obdValue)) 
obdEvent = Event()
obdThread.start()
Figure 3 and 4 below display the running program.
Figure 4

Figure 3  
Above Figure 3 displays information as it comes in, before it is updated on Figure 4.
def write_to_UI(self,values):
"""Updates the UI with new values"""
# receive [speed, rpm, intake, coolant, load]
self.ui.lcdNumber_speed.display(values[0])
self.ui.lcdNumber_rpm.display(values[1])
self.ui.lcdNumber_inTemp.display(values[2])
self.ui.lcdNumber_coolTemp.display(values[3])
self.ui.lcdNumber_load.display(values[4])
QtGui.QApplication.processEvents() #Writes all pending changes to QT
return
The guts behind the scanning thread is all in pySerial. The code below show how the scanner obtains values from the OBDII sensor. This example is the speed however the method is the same for all.

First a serial port is connected, "rfcomm0" at a baud rate of "38400".
self.serialIO = serial.Serial('/dev/rfcomm0', 38400, timeout=1)
Then using the serialport you send send a hexadecimal PID which can be found here. In this case we send "01", "0D" and want a return "\r". ("01" stands for the current value, "0D" is speed.)
self.serialIO.write("01 0D \r")
The above line will return a list of 1 string "['410D1D\r\r>']" not including quotes. The bold values are what is needed. They are a hexadecimal value so the code below first pulls the needed values by treating the string as a list. Then converts (Using the example) from a string, '1D', to hex value '0x1D' to an integer, base zero, 29 to a float 29.0 The final answer being in Kph
(I apologize for that long run on sentence I hope you were able to follow)
speed_list = self.serialIO.readline().split(' ')
speed_hex = speed_list[0][4:6]
speed_float = float(int("0x"+speed_hex, 0))
 
I then converted the value to Mph and returned it in a list with other values.
speed_float = speed_float*0.621371 #Comment out if you would rather have Kph
return speed_float
The last feature I added in this version is the ability to clear error codes. It is placed in the setting tab as depicted in Figure 5.
Figure 5
This tab will have more options evenly and will have feedback to the clearing function.

------------------------------------------------------------------------------------------------------------------------------
There you have it the basic functionality of pi2go and how it works. Any feedback will be outstanding!
As always if you would like to follow/keep up on this blog or check out github. I have many new features to add.

**For those that care written in Python2.7 utilizing pyQt4 over pySerial. Issue tracker

Saturday, May 18, 2013

Conky Time!!!

Well this is one of my past projects ( of a week or so.) Probably wondering why I am writing such a late project, well my Raspberry Pi is down for the count. So here we go.

Conky is a cool little script service for Linux and BSD that allows one to monitor an entire system. The option are nearing endless because its ability to run bash straight from the config file (.conkyrc) Anyway here is what I did:
Styled like Google Now :P but fitted to match Ambience Ubuntu theme. Logos were included that match the system specs. I will save  you all and not go into the editing that took place however if you want to know, hit me up I will be happy to help out. 

If you love it (or think you can do better) here is the link to my files feel free to edit:  Linky

Credit for the Google Now weather style and functionality goes to : satya164

Good link on the GNow setup: Linky

**The customary for those who care
   Ubuntu 13.04 Raring Ringtail, AMD Phenom II X4 964 OC@3.8, w/Conky