Saturday, December 28, 2013

Become a key binding pro using xbindkeys

Hey all this time around Im going to show you how to set up key bindings using xbindkeys. I found the need for this after picking up a new mouse for my desktop, Logitech MX pro. I gotta say this is one beautiful mouse; darkfield laser, frictionless scrolling, too much. However it came with a few extra buttons not supported by default in Ubuntu, so of course I had to fix it. Now the following process should work on any Debian based system and any system using the xautomation package. So...... lets get started

STEP 1: Install all the packages
     Complete this using your favorite package manager. I will use aptitude in my examples.
 $ sudo apt-get install xbindkeys xautomation
STEP 2: Setup the default xbindings
    To make the necessary config file enter the command below.
$ xbindkeys --defaults > $HOME/.xbindkeysrc  
STEP 3: Find your keys
    This step works for not only a mouse, but also any key combo on your  keyboard.

    Lets run the event catcher. You can use either xev or xbindkey command. Use the -k option to catch a single event. Use the -mk option to collect multiple.
    $ xbindkey -k
If completed correctly the terminal will display something like:
"(Scheme function)"
    m:0x10 + c:248
    Mod2 + NoSymbol

This is a random button on my laptop which has no function..... till now :P
STEP 4.1: Lets edit  the config file
Use your favorite editor, I will show gedit in this example.
 $ sudo gedit .xbindkeysrc
I highly recommend removing all of the default emulations from the file. Otherwise some of your favorite shortcuts will be remapped. (About line 34 and above.) If not you can always fix it later.

Now just copy and paste your event from earlier into the file. Now, the line that reads "(Scheme function)" is the command to be run. In this example I would like it to open my calculator, being its location on the num pad.
"gnome-calculator"
    m:0x10 + c:248
    Mod2 + NoSymbol
This works a little differently when working when emulating keyboard shortcuts. Keep reading.

STEP 4.2: If you want to emulate a keyboard shortcut, i.e. use one button to "press" multiple, we need to use the xautomation package from earlier. In my example I use the thumb button on my mouse to open the unity dash and to open the window spread. The shortcuts are Super and Super+w respectively. To emulate keyboard commands we use the command "xte". Here is my command for the dash:
"xte 'key Super_L'"
b:13 + release
Use the "key" descriptor when there are no subsequent button presses. This command claims the the left super key. You could also use "Super_R" which is the right key. The "b:13" refers to the physical button of the mouse. Finally the "+ release" is very important. This assures that your finger has released the button before executing the command.

The next example is to open the window spread. This is very similar to the previous example. The main difference here is the use of the "key*" command. These descriptors assure that the middle button is pressed before the Super key is depressed.
"xte 'keydown Super_L' 'key w' 'keyup Super_L'"
b:10 + release
Just for reference here is what my file looks like.
 # For the benefit of emacs users: -*- shell-script -*-
###########################
# xbindkeys configuration #
###########################
#
# Version: 1.8.5
#
# If you edit this file, do not forget to uncomment any lines
# that you change.
# The pound(#) symbol may be used anywhere for comments.
#
# To specify a key, you can use 'xbindkeys --key' or
# 'xbindkeys --multikey' and put one of the two lines in this file.
#
# The format of a command line is:
#    "command to start"
#       associated key
#
#
# A list of keys is in /usr/include/X11/keysym.h and in
# /usr/include/X11/keysymdef.h
# The XK_ is not needed.
#
# List of modifier:
#   Release, Control, Shift, Mod1 (Alt), Mod2 (NumLock),
#   Mod3 (CapsLock), Mod4, Mod5 (Scroll).
#
# The release modifier is not a standard X modifier, but you can
# use it if you want to catch release events instead of press events

# By defaults, xbindkeys does not pay attention with the modifiers
# NumLock, CapsLock and ScrollLock.
# Uncomment the lines above if you want to pay attention to them.
#################################################################
#Thumb Button
"xte 'keydown Super_L' 'key w' 'keyup Super_L'"
b:10 + release

#Zoom Button
"xte 'key Super_L'"
b:13 + release

#Calculator
"gnome-calculator"
    m:0x10 + c:248
    Mod2 + NoSymbol

##################################
# End of xbindkeys configuration #
##################################

I hoped I was able to help! Have fun modding!

**The customary for those who care
   Ubuntu 13.10 saucy salamander, xbindkey


Sunday, November 24, 2013

GPS opinions in pi2go??

Hey all, I've decided to embrace Thanksgiving break and have been cranking away at pi2go. So far I have added some better functionality as far as threading goes and started working on adding GPS functionality.

My question to you.......What are some good features to add in a GPS tab?

Here is a basic layout I have so far:


What should I add? What should I take away?

So far I am thinking of:
- Logging data (I have a cool idea :) )
- Direction changes
- Raw stats (latitude, longitude, altitude, etc)

Thanks!!!!

If you are curious on the project, here are some links.
- pi2go
github
- Not to mention other posts 

**For those that care written in Python2.7 utilizing pyQt4 all for the Raspberry Pi


Sunday, November 10, 2013

Alt GCC android build

Have you ever had the thought of "Hey GCC has some room for improvement in my android kernel build?" Well of course you did, even if you didnt know it. One of the most well known GCC tool chains is Linaro. This tool chain includes many optimizations over GCC. Needless to say I wont bother you with too many details. Lets just say that a built kernel with an alt GCC tool chain gives android many performance improvements.

Now to the fun part. How does one do such a thing? For my builds I use the SABERMOD toolchain. It includes much of Linaro with a few more optimizations. Linky's below:

Linaro 4.8 and SABERMOD 4.9

Now within your ROM's working directory

$ cd <working dir>/prebuilts/gcc/linux-x86/arm

Unpack whichever tool chain you would like to use.

Next!

$ sudo gedit build/envsetup.sh
  
Look for the following line (line 155)


 # The gcc toolchain does not exists for windows/cygwin. In this case, do not reference it.
    export ANDROID_EABI_TOOLCHAIN=
    local ARCH=$(get_build_var TARGET_ARCH)
    case $ARCH in
        x86) toolchaindir=x86/i686-linux-android-$targetgccversion/bin
            ;;
        arm) toolchaindir=arm/arm-linux-androideabi-$targetgccversion/bin
            ;;
        mips) toolchaindir=mips/mipsel-linux-android-$targetgccversion/bin
            ;;
        *)
            echo "Can't find toolchain for unknown architecture: $ARCH"
            toolchaindir=xxxxxxxxx
            ;;
    esac
This is the directory to your tool chain change it to your new tool chain location. For example my line 155 reads
 arm) toolchaindir=arm/sabermod-4.9/bin
because that is the name of my directory in "prebuilts/" .
After making those changes you you are ready to build the android. Continue with lunch or a build script if provided.
Good Luck!!
**As always for those who care
   Ubuntu 13.10, PAC-rom 4.3, SABERMOD4.9
 

Thursday, October 17, 2013

I'm not dead!!

This is just to let you also know I am not dead. Rather merely running out of free time. So here is a list of things Ive been up to and will write about in the near future.

- Analog to digital Conversions
- Pulse Width Modulation
- Assembly Language
- Verlilog Language
- Gate Logic
- Opamps (probably soon due to an exam)
- LaTex ( Soon because it is soooooo helpful for technical writing)
- Some secret stuuf I cant mention until it is published.
- Building custom Android ROM's

and

- pi2go is getting some cool GPS tracking and touchscreen features

Until then, if you want to hear about any of these topics let me know!

Saturday, August 24, 2013

Did somebody say custom??

So I decided to take a small break today in order to bring up an old topic.....Kernels.

Now if you're just like me, running something stock is just like "using devils left hand to care for young children." One way to change direction is to utilize an alternate kernel. Now this time I am speaking strictly of the Ubuntu distro. (Ask me later of my custom Nexus 4 kernel.) I will give you Very Easy! step by step instructions in order to harness the raw power of alternate kernels.

One may ask "What will a new kernel do?" Well in laymans terms, it allows one's system to be brought on the same level with all new linux commits straight from Linus himself. So basically "The Bleeding Edge" (Not to be confused with Ubuntu Edge *insert sad story)

Now on my system I currently run the RC Ubuntu kernel, but I will provide the links to a very good custom kernel know as pf-kernel. This kernel has many more optimizations.

First off .........NOT RESPONSIBLE FOR ANYTHING THAT GOES WRONG!!!!


Now since that is out of the way..... lets download said kernel:
- For stock Ubuntu: http://kernel.ubuntu.com/~kernel-ppa/mainline/
- pf-kernel if you choose: http://repos.natalenko.name/debian/pf/
Note: pf-kernel has many Linux optimizations read here for a good little article.

Step 1: Find the current version you need.

To play it safe grab a version with your same release name. i.e. 13.04 is "raring"
Figure 1
If you do not want to play safe.....totally cool. Besides where is the fun in safety. (Be sure to keep a backup. Covered at the end)

In order to find out your current version of kernel open a terminal and type
uname -a
Giving a response of  Figure 2. I have version 3.9.0-030900
Figure 2

Step 2: Download the right 3

On the next page you will 3 different endings "amd64", "armhf", and "i386." This is your architecture.
YOU NEED TO KNOW WHICH. To find out refer to Step 1 above.

In this example I will be using "amd64."
Next you need to download 3 files "linux-headers", "linux-image", and linux-headers-xxxxxxxxxxxx_all.deb." Refer to Figure 3.
Figure 3
Choose the correct ones for your architecture. Once they have finished downloading open a terminal and "cd" to the download location.
cd ~/Downloads

Step 3: Time to install

Once in the working directory run
sudo dpkg -i *.deb
Note the "*.deb" makes dpkg use every deb file in directory. If you have more then the 3 recently downloaded > MOVE to a new directory!

Step 4: Update

 In order to boot a new kernel you need to update the grub. In order to do this run:
sudo update-grub2
The result should be much like Figure 4 below.
Figure 4

Step 5: Reboot

The final step. Reboot your device. At the grub menu(after bios) choose your new kernel. Note: you may have to press escape in order to show the menu.
Figure 5 shows a grub shot. (Outdated)
Figure 5

Cleanup/Backup

Despite not being an actual step these are very important.
In order to rid a kernel of being installed use apt-get.
sudo apt-get remove linux-xxxxxx
 xxxxxx being the "linux-headers" or "linux-image." Remember to remove all 3 files mentioned above in Step 2.

Important: Be sure to leave at least one STABLE kernel on your system. In case something goes wrong. At least you will be able to boot to the old kernel. (This is what I considered a backup)

FINI

There you have it your very own....nonstock....kernel. If you have any questions feel free to ask.

**For those that care
Ubuntu 13.04, amd64, 3.9.0-030900-generic

Monday, July 8, 2013

RPi is planted

So I decided to take it upon myself to finally mount my pi/screen in my vehicle.
Here are the results, luckily the 'stang had an extra din slot for the old '00 radio that was replaced awhile back. I bought a 7"TFT of ebay for ~$30 here. I am currently looking into purchasing a digitizer for it (touch screen.)

So here we go:
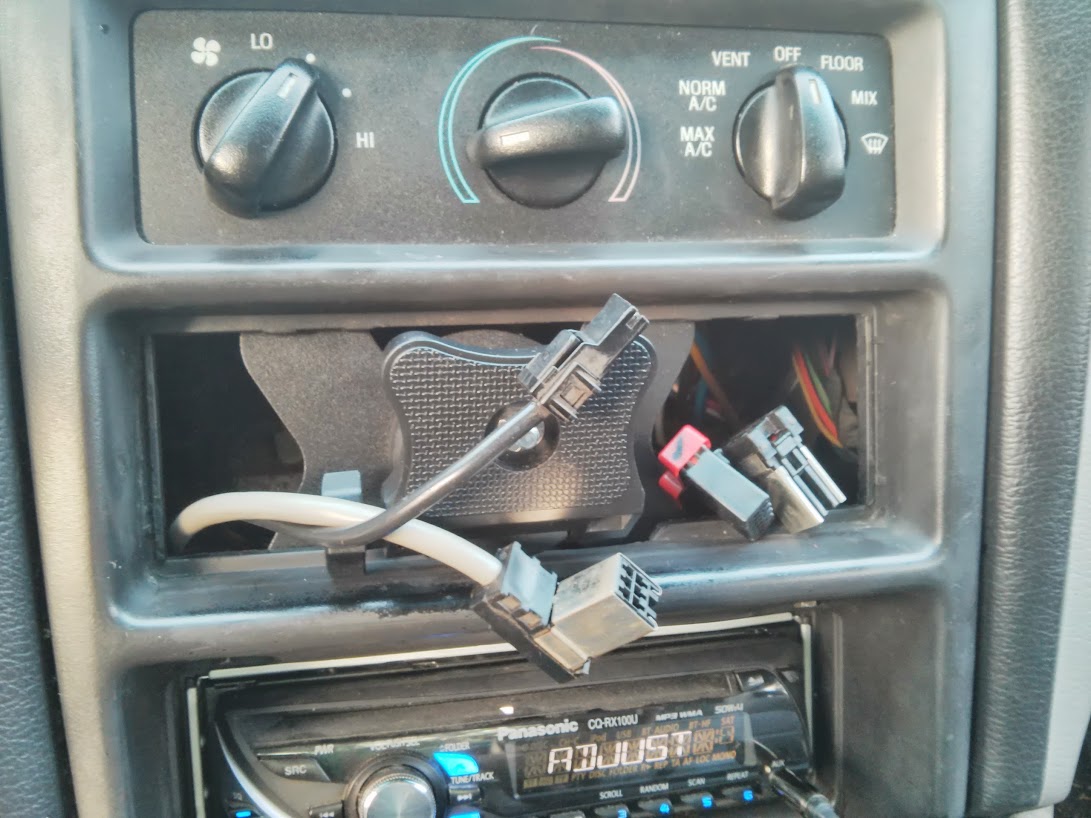
In Figure 1 notice the radio in Din 3. (Counting the vents as Din 1.)
Figure1: Before
 I then proceeded to take out the center console. Depicted in Figure 2 and 3 below.
Figure 2
Figure 3


This allowed me to mount the stand for the screen. Figure 4 Also note the radio is now in Din4.
Figure 4


The screen is slightly larger then the Din available, in order to account for this I had to improvise. I made the mount able to tilt up and down. Figure 5 and 6 below.
Figure 5
Figure 6
 I have yet to wire everything into key-on power, but here is the near-end result. Figure 7 and 8. Running pi2go ...of course
Figure 7


Through the whole process I only lost one important bolt, I call that a win. Despite the fact it was for mounting the screen. :/

So.....let me know what you think. As always if your interested in the project follow this blog, add me to your circles, or follow github.

Just for fun in-progress photos:


Soon I will be adding Bluetooth support to the UI. I also fixed that pesky UI update issue by utilizing a QThread.

**For those that care:
Built on the RPi using python2.7, QT4, 7" TFTLCD Screen

Friday, June 28, 2013

OpenCV Vision of the future!!

Its been awhile since I made a post, so I will make a few updates
 - pi2go Is working even fixed that pesky GUI not updating issue with a Qthread.
 - pi2go also has its very own 7in screen I have yet to mount. (Ill do a post with updates soon.)

- Halo is now open source!! Yeah, I know its kind of old news but im loving the functionality.

But now its time to describe my latest project and why I havent been around for awhile: OpenCV.

In what else but Python --->> but eventually MATLAB for Simulink reasons.

OpenCV is "Open Computer Vision." The idea behind this is to make most computer vision tasks as easy as possible to complete. So what am I doing with it? I'm trying to integrate object avoidance with stereo vision. So far I have managed to make a disparity map using 2 uncalibrated images.

You really cant see to much relation yet between the 2 figures.

Figure 1

Figure 2

Figure 1 the disparity map shows that close objects as black and farther objects as white, basically the depth of the image using. In order to get a clear image the camera needs to be calibrated. From this map I would like to be able to pick out individual objects that are extremely close by.


I have been testing with 2 close images taken from my nexus 4....sooooo not too accurate. Once I get the stereo vision up/working and calibrated These images will be much better. Stay tuned!!!

**For those that care
OpenCV 4.5.2 ~cv2 , Python2.7, scipy